Physical Address
304 North Cardinal St.
Dorchester Center, MA 02124
Physical Address
304 North Cardinal St.
Dorchester Center, MA 02124

Master KitchenAid mixer recipes with this beginner's guide. Learn stand mixer baking basics, easy cookie recipes, bread dough tips, and foolproof techniques.
So you finally did it. You got yourself a KitchenAid stand mixer—maybe as a gift, maybe after months of eyeing that gorgeous machine in every color imaginable. Now it’s sitting on your counter, all shiny and intimidating, and you’re thinking: “What exactly do I do with this thing?”
I get it. When I first unboxed mine, I stood there for a solid ten minutes, just staring at the attachments as if they were ancient artifacts. The dough hook looked vaguely threatening. The wire whip seemed delicate enough to break if I breathed on it wrong. And don’t even get me started on figuring out which speed to use without launching flour across my entire kitchen (spoiler alert: I learned that lesson the hard way).
Here’s the truth: your KitchenAid mixer isn’t just some fancy kitchen decoration—it’s about to become your secret weapon for baking everything from cookies that’ll make your neighbors jealous to bread that actually looks like it came from a real bakery. And you don’t need to be some culinary genius to make it happen.
This guide is for everyone who’s ever felt intimidated by baking, anyone who’s bought a stand mixer and let it collect dust, and those brave souls attempting their first loaf of bread. We’re going to break down beginner kitchenAid recipes that actually work, walk through the basics without the pretentious jargon, and get you baking like you’ve been doing this for years.
Ready? Let’s turn that beautiful machine into your hardest-working kitchen companion.
Before we dive into recipes, let’s talk about why this mixer matters. You could technically make everything by hand—people did it for centuries, after all. But here’s the thing: a stand mixer eliminates about 90% of the physical work and 100% of the arm fatigue that comes with traditional baking.
When you’re creaming butter and sugar by hand, you’re looking at a solid 10-15 minutes of relentless stirring. Your KitchenAid? Three minutes, tops, and you can walk away to check your phone or pour yourself coffee. It’s consistent, powerful, and honestly makes baking feel less like a workout and more like actual fun.
Plus—and this is crucial for beginners—it helps you avoid common mistakes. Over-mixing cookie dough? The mixer stops when you tell it to. Under-whipped meringue? You can see exactly when those glossy peaks form. It takes the guesswork out of techniques that intimidate new bakers.
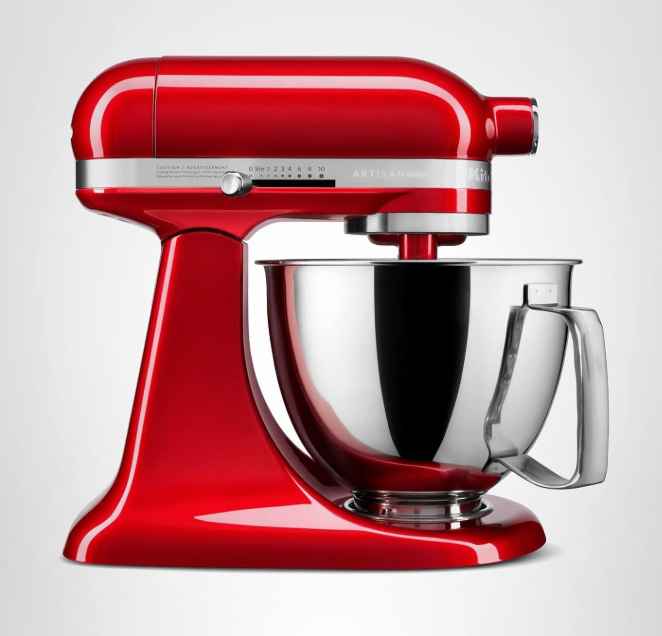
Look, I could overwhelm you with technical specs and motor wattage, but let’s be real: if you’re just starting, the KitchenAid Artisan Series 5-Quart Tilt-Head Mixer is probably your best bet. It’s the Goldilocks of stand mixers—not too big, not too small, and powerful enough for pretty much everything a beginner (and even advanced baker) would tackle.
The tilt-head design means you can easily pop the bowl on and off without wrestling with levers, and the 5-quart capacity handles standard recipe sizes perfectly. Plus, it comes in about 45 colors, so you can match it to your kitchen aesthetic or just pick your favorite.
If you’re working with limited counter space or know you’ll mostly be baking smaller batches, the KitchenAid KSM3316X Compact Stand Mixer is a solid alternative. It’s got the same functionality packed into a smaller footprint, which apartment dwellers will seriously appreciate.
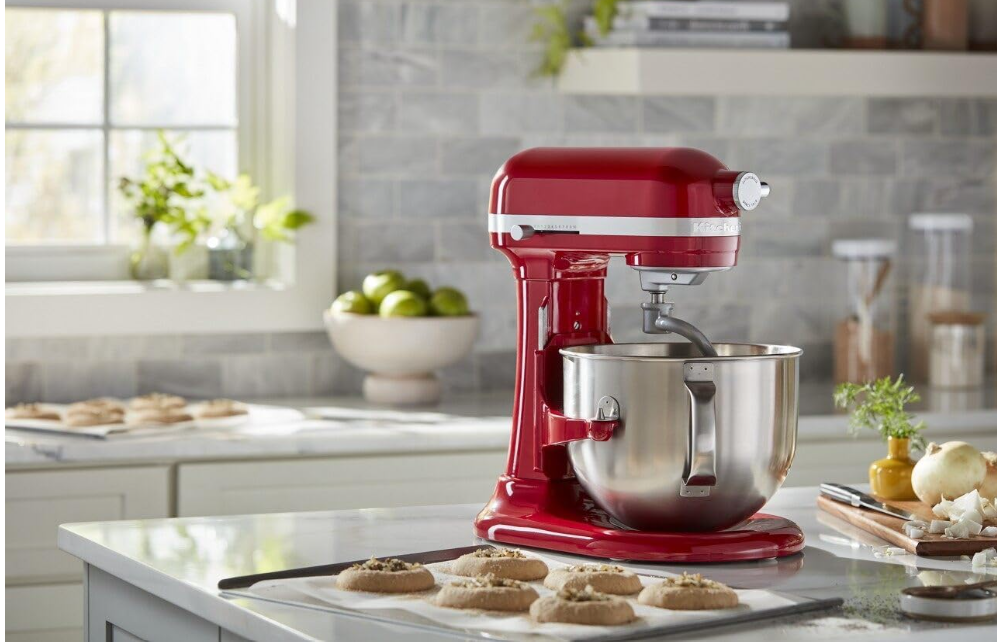
For those planning to eventually bake for crowds—think holiday cookie marathons or weekly bread baking—the KitchenAid KSM70SKXXER 7-Quart Bowl-Lift Mixer gives you room to grow. Just know it’s a beast, and if you’re making a single batch of brownies, that huge bowl might feel excessive.
Your mixer comes with three basic attachments, and honestly, these are all you need for about 95% of beginner recipes:
The Flat Beater (that paddle-looking thing): This is your workhorse for cakes, cookies, frosting—basically anything with a thick batter or dough. It’s designed to scrape the sides of the bowl as it spins, though you’ll still need to scrape down occasionally.
The Dough Hook (the spiral one): Bread dough is this attachment’s whole purpose. Instead of kneading by hand for ten minutes until your arms want to fall off, the dough hook does all that work for you. Game-changer for beginner bread bakers.
The Wire Whip (looks like a balloon whisk): For anything that needs air incorporated—meringues, whipped cream, egg whites, fluffy frostings. It’s delicate compared to the others, but incredibly effective.
One attachment I’d recommend adding to your collection early on is the KitchenAid Flex Edge Beater Attachment. It has a flexible silicone edge that continuously scrapes the bowl as it mixes, which means less stopping to scrape down the sides manually. For beginners who are still getting the hang of proper mixing, this is genuinely helpful.

This is the foundation of countless recipes—cookies, cakes, frosting—and getting it right makes everything else easier. Here’s the thing nobody tells you: butter temperature matters more than you think.
You want your butter at room temperature, which means it should be soft enough that you can press your finger into it and leave an indent, but not so warm that it’s melting or greasy. If you forgot to take it out ahead of time (we’ve all been there), cut it into small pieces and let it sit for 15-20 minutes.
Put your butter and sugar in the bowl with the flat beater attached. Start on speed 2 for about 30 seconds just to get things moving without creating a sugar dust cloud in your kitchen. Then increase the speed to 4 or 6 and let it run for about 3-5 minutes. You’re looking for the mixture to become pale, fluffy, and noticeably increased in volume.
The mistake most beginners make? Not creaming long enough. If your mixture still looks yellow and grainy, keep going. When it’s properly creamed, it should be almost white and have a mousse-like texture.
Your KitchenAid has 10 speeds, which seems like overkill until you realize each one serves a purpose. Here’s your cheat sheet:
Speeds 1-2 (Stir/Slow Mix): Use these for initial combining of ingredients, especially dry ones. This is where you start when you don’t want flour exploding everywhere.
Speeds 4-6 (Medium): This is your sweet spot for most creaming, beating, and standard mixing. Cookie dough, cake batter, frosting—most of your work happens here.
Speeds 8-10 (High): Reserved for whipping air into things—meringues, whipped cream, egg whites. Be careful here; over-whipping can happen fast.
For cookie dough specifically, start on speed 2 to incorporate your dry ingredients, then bump to speed 4 for about 30 seconds once everything’s mostly combined. The goal is to mix just until the flour disappears—over-mixing develops gluten and makes cookies tough.
Let’s discuss the least enjoyable part: cleanup. Good news—it’s easier than you think.
The bowl and all attachments are dishwasher safe; however, I hand-wash mine because I’m concerned about the beautiful finish getting scratched. For the mixer itself, unplug it (obviously), then wipe down the head and body with a damp cloth. Never submerge the mixer or spray it directly with water—the motor housing needs to stay dry.
For stuck-on batter or dough, don’t scrub aggressively. Let the attachment soak in warm soapy water for a few minutes, and everything should come off easily. The area where the attachment connects to the mixer head can trap bits of ingredients, so use a damp cloth or small brush to clean that spot.
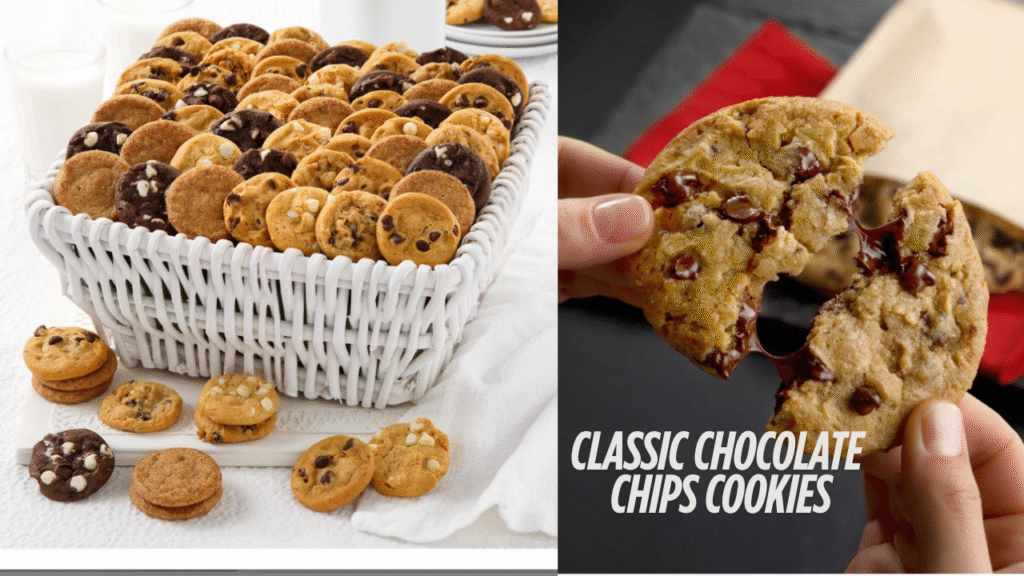
Let’s start with the recipe that launched a thousand baking careers. These cookies are nearly impossible to mess up, and your KitchenAid makes them even easier.
What you need:
The process: Attach your flat beater. Cream butter and both sugars on speed 4 for 3-4 minutes until fluffy. Add eggs one at a time on speed 2, then mix in vanilla. In a separate bowl, whisk together flour, baking soda, and salt. Add to your mixer on speed 1 just until combined—stop as soon as you don’t see dry flour anymore. Fold in chocolate chips by hand or on the lowest speed for just a few seconds.
Scoop onto baking sheets and bake at 375°F for 9-11 minutes. They’ll look slightly underdone when you take them out—that’s perfect. They firm up as they cool.
Pro tip: If your dough seems too soft to scoop, refrigerate it for 30 minutes. This also prevents cookies from spreading into flat pancakes.
This is your base recipe for birthday cakes, cupcakes, or just because it’s Tuesday and you want cake. The KitchenAid makes the mixing so smooth that you’ll get professional-level results.
Ingredients:
How to make it: Cream butter and sugar with the flat beater on speed 4 for 5 minutes—yes, a full five minutes. This creates the tender crumb you want in cake. Add eggs one at a time, beating well after each. In another bowl, mix dry ingredients. With mixer on speed 2, alternate adding flour mixture and milk, starting and ending with flour (flour, half the milk, flour, rest of milk, flour). Mix just until combined. Add vanilla on speed 2 for 10 seconds.
Pour into two greased 9-inch cake pans. Bake at 350°F for 25-30 minutes. Let cool completely before frosting.

Got brown bananas? Perfect. This beginner banana bread kitchenaid recipe is probably the most forgiving thing you’ll ever bake. Even if you mess up the measurements slightly, it still turns out delicious.
What you’ll need:
The method: Mash bananas with a fork in your mixer bowl (or mash separately if you prefer). Add melted butter with the flat beater on speed 2. Mix in sugar, egg, and vanilla on speed 4 for 1 minute. Sprinkle baking soda and salt over the mixture and mix on speed 2. Add flour last, mixing on speed 1 just until incorporated.
Pour into a greased 9×5-inch loaf pan. Bake at 350°F for 60-65 minutes. A toothpick should come out clean or with just a few moist crumbs.
Beginner mistake to avoid: Don’t overmix once you add the flour. A few lumps are fine—overmixing creates tough, dense bread.

These basic muffins are your blank canvas. Blueberries, chocolate chips, nuts—throw in whatever sounds good. The KitchenAid ensures everything gets evenly distributed without overmixing.
Ingredients:
How it’s done: Mix dry ingredients in your bowl on speed 1 with the flat beater. In a separate container, whisk together milk, melted butter, and egg. Add wet ingredients to dry on speed 2, mixing just until combined—about 20 seconds. Fold in your add-ins by hand.
Scoop into lined muffin tins. Bake at 400°F for 18-20 minutes. These easy muffins stand mixer recipes are perfect for breakfast meal prep.

Here’s where the dough hook earns its keep. Making bread by hand requires serious arm strength and patience. Your KitchenAid? It handles the kneading while you scroll through your phone.
What you need:
The process: Combine flour, sugar, salt, and yeast in your bowl with the dough hook attached. Add butter and warm water. Start on speed 2 for about 30 seconds to bring everything together, then increase to speed 4 and knead for 5-7 minutes. The dough should pull away from the sides of the bowl and be smooth and elastic.
Place dough in a greased bowl, cover with a towel, and let rise in a warm spot for about an hour until doubled. Punch down, shape into a loaf, and place in a greased 9×5-inch pan. Let rise again for 30-40 minutes. Bake at 375°F for 30-35 minutes.
Beginner bread tip: The water temperature is important. Too hot kills the yeast, too cold and nothing happens. Between 105-115°F is the sweet spot.

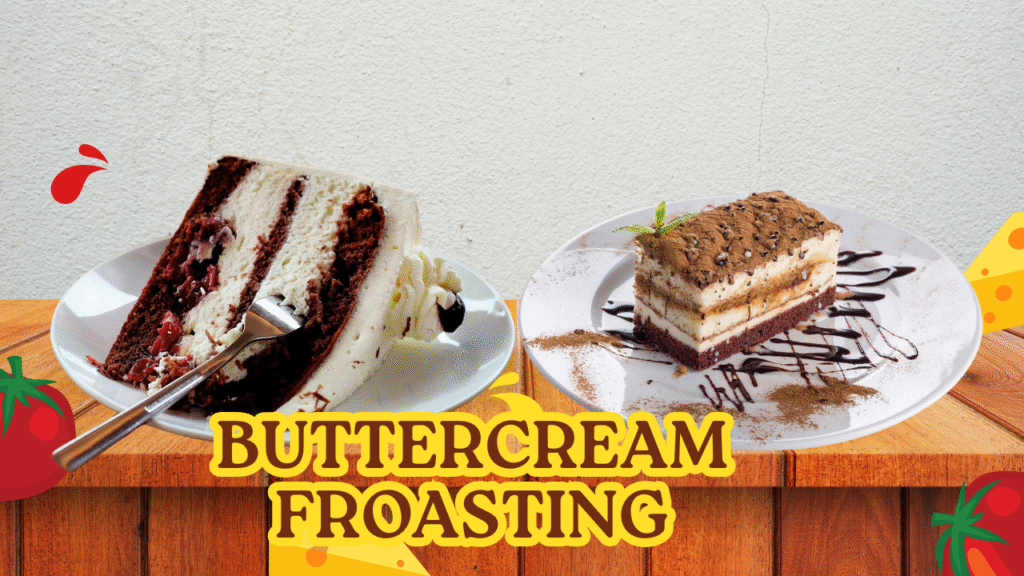
This kitchenAid frosting for beginners recipe is essential knowledge. Once you master basic buttercream, you can frost anything from cupcakes to layer cakes with professional-looking results.
Ingredients:
How to whip it up: Beat butter with the flat beater on speed 4 for 2-3 minutes until creamy. Reduce to speed 1 and gradually add powdered sugar, one cup at a time. Once incorporated, add vanilla. Increase to speed 6 and beat for 3-4 minutes, adding cream one tablespoon at a time until you reach your desired consistency. For fluffier frosting, beat on speed 8 for an additional minute.
The mixture should be light, fluffy, and hold its shape. If it’s too thick, add more cream. Too thin? Add more powdered sugar.
Flavor variations: Add cocoa powder for chocolate, lemon zest and juice for citrus, or a tablespoon of instant coffee for mocha.
Are KitchenAid mixers suitable for whipping meringue? Absolutely—in fact, this is where the wire whip attachment really shines. This Swiss meringue method is more stable than French meringue and perfect for beginners.
What you need:
The technique: Attach the wire whip. Combine egg whites and sugar in your mixer bowl and place over a pot of simmering water (don’t let the bottom touch the water). Whisk constantly until the mixture reaches 160°F and sugar dissolves completely—about 5 minutes.
Transfer bowl to mixer. Start on speed 6 with cream of tartar. Gradually increase to speed 8-10 and whip until stiff, glossy peaks form—about 8-10 minutes. The bowl should be cool to the touch. Add vanilla in the last minute of mixing.
Use immediately for topping pies or pipe onto baking sheets for cookies. Bake at 200°F for 1.5-2 hours for crispy meringues.

Your kitchenaid dough hook baking skills aren’t limited to bread. This pizza dough recipe is ridiculously simple and yields that perfect chewy-crispy crust.
Ingredients:
Making the dough: Mix flour, yeast, sugar, and salt in your bowl with the dough hook. Add olive oil and warm water. Mix on speed 2 until combined, then increase to speed 4 and knead for 5-6 minutes. The dough should be smooth and slightly tacky but not sticky.
Let rise for 1 hour, then divide into two balls for two 12-inch pizzas or keep whole for one large pizza. Roll out, add toppings, and bake at 475°F for 12-15 minutes.
Pro move: Make a double batch and freeze the extra dough. It keeps for up to 3 months and makes weeknight pizza night incredibly easy.

When you want something elegant but dead simple, shortbread is your answer. Just three ingredients, and your KitchenAid makes them impossibly tender.
What you need:
The simplest method: Cream butter and sugar with the flat beater on speed 4 for 4 minutes. Reduce to speed 2 and add flour gradually until just combined. The dough will be crumbly at first but will come together.
Roll dough to ½-inch thickness and cut into shapes, or press into a 9×13-inch pan and score into squares before baking. Bake at 325°F for 20-25 minutes until edges are barely golden.
Flavor add-ins: Try vanilla extract, lemon zest, or lavender for sophisticated variations.
Insert image of elegant shortbread cookies arranged on a plate here
Okay, technically not baking, but your wire whip can make incredible ice cream without an ice cream maker. This is basically magic.
Ingredients:
The magic process: Attach the wire whip. Whip heavy cream on speed 8-10 until stiff peaks form—about 4-5 minutes. In a separate bowl, mix condensed milk and vanilla. Gently fold the whipped cream into the condensed milk mixture by hand (don’t use the mixer for this part or you’ll deflate all that air).
Pour into a loaf pan, cover, and freeze for at least 6 hours. The texture is creamy and scoopable—no ice crystals.
Variations: Mix in crushed cookies, chocolate chips, fruit puree, or coffee for different flavors.

Honestly? Pretty much everything in this guide. The 5-quart capacity is the standard size that most recipes are written for. You can comfortably make a double batch of cookies, a two-layer cake, or enough bread dough for two loaves. Where you might run into limits is when scaling recipes up significantly—like if you’re trying to make cookies for 100 people in one batch.
The tilt head mixer recipes that work particularly well are single-batch cakes, standard cookie recipes (which usually yield 3-4 dozen), and bread dough that uses up to 4 cups of flour. Once you start going beyond those amounts, a larger bowl-lift model makes more sense.
Absolutely, and actually, the mixer helps maintain consistency when you’re adjusting recipes for altitude. If you’re baking above 3,000 feet, you typically need to make tweaks like reducing sugar slightly, increasing liquids, and sometimes adding extra flour.
The KitchenAid’s consistent mixing speed helps ensure your adjustments work properly—you’re not accidentally undermixing or overmixing due to arm fatigue. Just follow standard high-altitude baking guidelines for your recipes. The mixer itself doesn’t need any special adjustments.
Let’s get specific about KitchenAid mixer tips for cakes because this is where beginners often struggle. Cakes are more finicky than cookies—the difference between light, fluffy perfection and a dense brick often comes down to mixing technique.
Room temperature ingredients: This isn’t negotiable for cakes. Cold eggs and butter won’t emulsify properly, leading to a dense texture. Everything should be around 65-70°F.
The creaming method matters: When a recipe says to cream butter and sugar for 3-5 minutes, it’s not a suggestion. This incorporates air that helps the cake rise and creates that tender crumb. Under-creamed = dense cake.
Don’t overmix once flour is added: This is the number one mistake. Once you add flour, gluten starts developing. Too much mixing = tough, chewy cake instead of tender. Mix on speed 1-2 just until you don’t see dry flour anymore—20-30 seconds max.
Scrape the bowl: Even with the best mixer, ingredients can hide at the bottom of the bowl. Stop the mixer a couple of times and scrape down the sides and bottom with a spatula.
The toothpick test: Your cake is done when a toothpick inserted in the center comes out clean or with just a few moist crumbs. If there’s wet batter, keep baking. If the toothpick is completely clean, you might have slightly overbaked—still fine, just watch more carefully next time.
Once you’ve mastered these basics, you’ll start to notice patterns. Cookies generally follow the same structure: cream butter and sugar, add eggs, and add dry ingredients. Cakes have their own formula. Bread dough has its rhythm.
This is when baking becomes less intimidating and more intuitive. You’ll start tweaking recipes, substituting ingredients, and maybe even creating your own variations. That gorgeous KitchenAid mixer on your counter will become second nature—you’ll know instinctively which speed to use, when something’s mixed enough, and how different doughs should look and feel.
The attachments you initially found confusing? You’ll be swapping them out without thinking. That dough hook will become your bread-making partner. The wire whip will be your go-to for anything fluffy. And you’ll wonder how you ever baked without this machine.
Insert image of various baked goods made with the KitchenAid mixer here
Start with one recipe from this guide. Seriously, just one. Make those chocolate chip cookies. Mix up that banana bread. Get comfortable with how your mixer feels, sounds, and operates.
Then try another. And another. Before you know it, you’ll be the person friends call when they need a birthday cake, the one bringing homemade bread to every gathering, the baker who makes it look effortless.
Your KitchenAid mixer isn’t just an appliance—it’s your ticket to becoming the baker you’ve always wanted to be. It’ll be there for stress-baking sessions at midnight, for impressive holiday spreads, for lazy Sunday morning muffins, and for those spontaneous “I need fresh bread right now” moments.
The best part? You don’t need years of experience or culinary school training. You just need decent ingredients, a willingness to try, and that beautiful stand mixer ready to do the heavy lifting.
So grab your flour, pick a recipe, and let’s get baking. Your kitchen is about to smell absolutely incredible.
Beyond your KitchenAid mixer, these tools make baking easier:
The KitchenAid Splash Guard attachment is worth every penny if you’re tired of flour clouds and batter splatters. It fits right on the bowl and has a convenient opening for adding ingredients while mixing.
Now get out there and bake something amazing. Your KitchenAid is ready when you are.